In the early days of 3D optical profiling, we needed to know an alphabet soup of measurement modes in order to operate the systems. Smooth surface? That’s one mode. Rougher surface? That requires another. A combination of both? We might not be able to measure it at all!
Today’s systems are smarter, and measurement modes that combine the best of the underlying techniques have made things a lot easier. In this post we’ll look at several measurement modes, building up to the latest.
Phase-Shifting Interferometry (PSI)
PSI was developed to measure very smooth surfaces, such as polished optics. In an interferometer, the difference in height between a test surface and a “perfect” reference surface forms a pattern of light and dark fringes called an “interferogram.” The height of the test surface is shifted in small increments relative to the reference, and several interferograms are collected. From these interferograms, the height of each point in the field of view can be determined with sub-nanometer resolution.
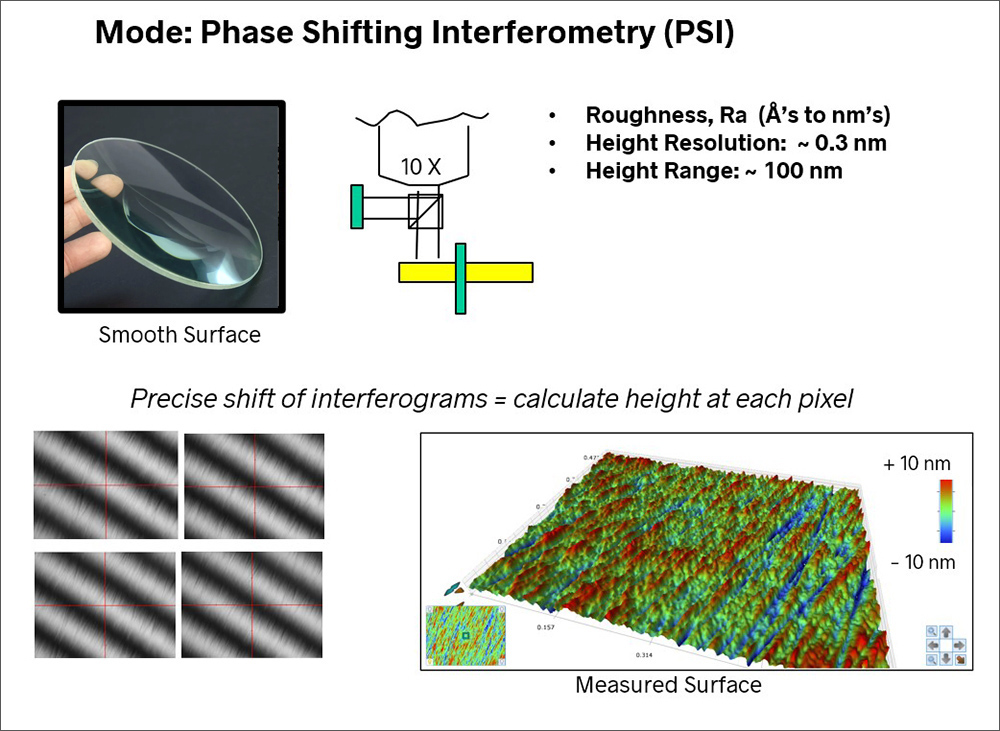
Phase Shifting Interferometry (PSI) measurement of a smooth surface
PSI measurements are limited to a height range of ~100 nm. If the surface is significantly curved or has steps or asperities greater than 100 nm tall, the PSI technique cannot measure them.
Vertical Scanning Interferometry
Vertical scanning interferometry (Bruker VSI) is a coherence scanning technique in which the measurement head scans the test part from top to bottom. For each pixel, the system records the position where the brightest interference fringe occurs, and that information is used to calculate the height at that pixel.
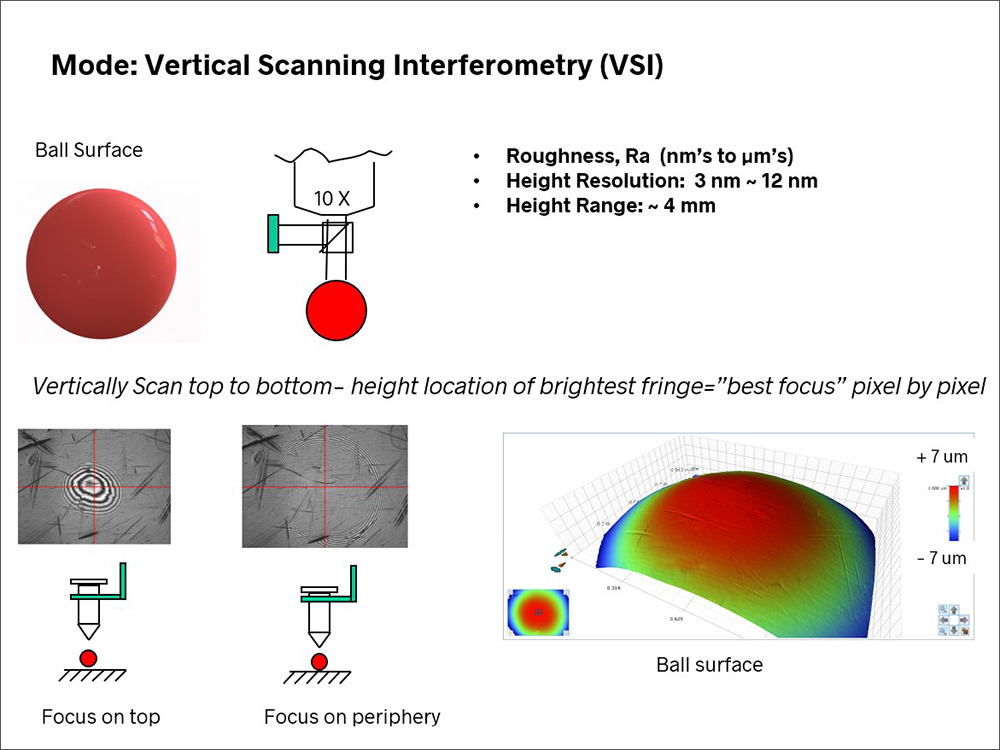
Vertical Scanning Interferometry (VSI) measurement of a spherical surface
In VSI mode you can measure much rougher surfaces, higher steps, and steeper slopes. The height resolution is lower than PSI, but this is an acceptable tradeoff for many applications.
A white light optical profiler equipped with both PSI and VSI modes can accommodate a wide range of surface roughness measurements. By switching between the modes in software, and by choosing the appropriate measurement optics, the instrument can readily shift between measuring smooth and rough surfaces without issue.
Sometimes PSI and VSI are not enough
Some applications, however, may still prove challenging. Consider trying to measure shallow scratches on a curved ball bearing surface. To measure the full ball shape, we need VSI mode—but in VSI mode, the resolution may be insufficient to measure the scratches and the surrounding surface finish. PSI mode would give us the resolution, but we could only measure the very top of the ball, beyond which the steeper slopes would preclude measurement.
VSI Plus PSI Mode (VXI)
In more recent years, instrument manufacturers have developed techniques that combine the range of VSI mode and the resolution of PSI. One example is Bruker’s VXI mode, which enables measurement of fine features over curved or complex surfaces or over larger fields of view.
VXI mode enables measurement of roughness from Angstrom-level to micron-level Sa (average roughness) values. The height of fine features can be measured with sub-nanometer resolution, even on complex curved surfaces.
In the image below, the VSI measurement (left) does a good job of analyzing the overall shape of the ball, while the PSI measurement (center) has sufficient resolution to correctly measure the pit near the top of the ball. VXI mode (right) is capable of measuring the fine texture and pits across a larger and more sloped area of the ball.
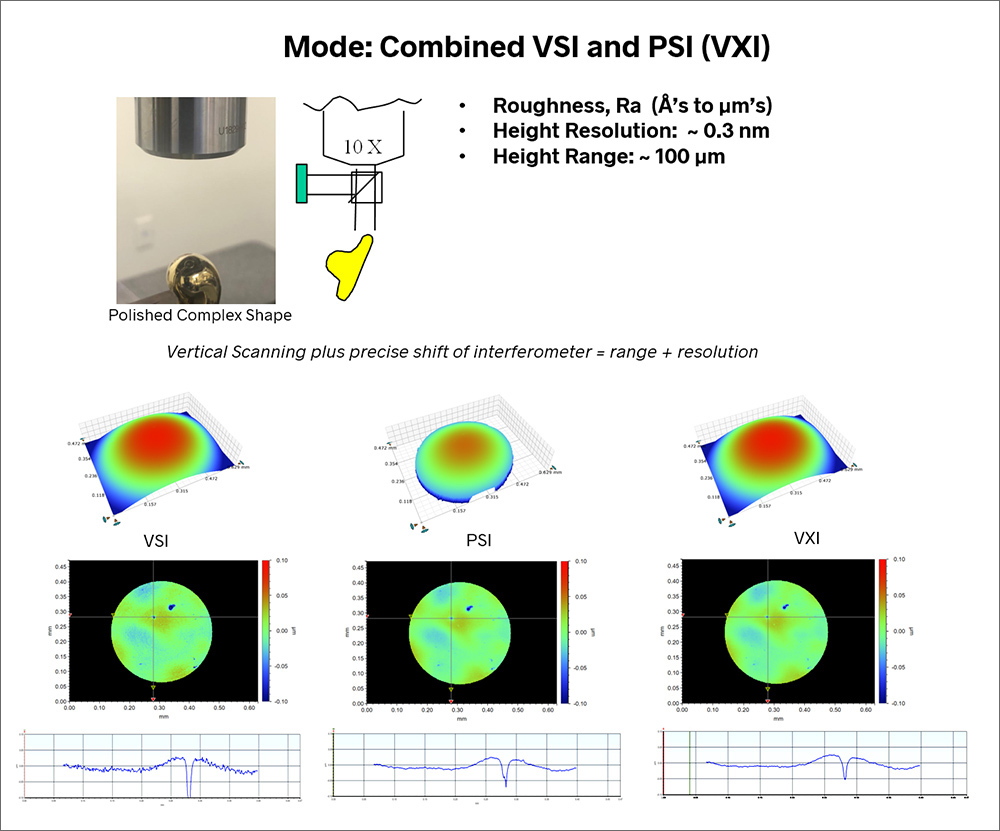
VXI Measurement of fine features on a spherical surface
VXI mode also makes it possible to measure polished surfaces with cylindrical cross sections, such as surgical wire. The image below shows a gage pin measured using VXI to capture the roughness on the highly curved surface.
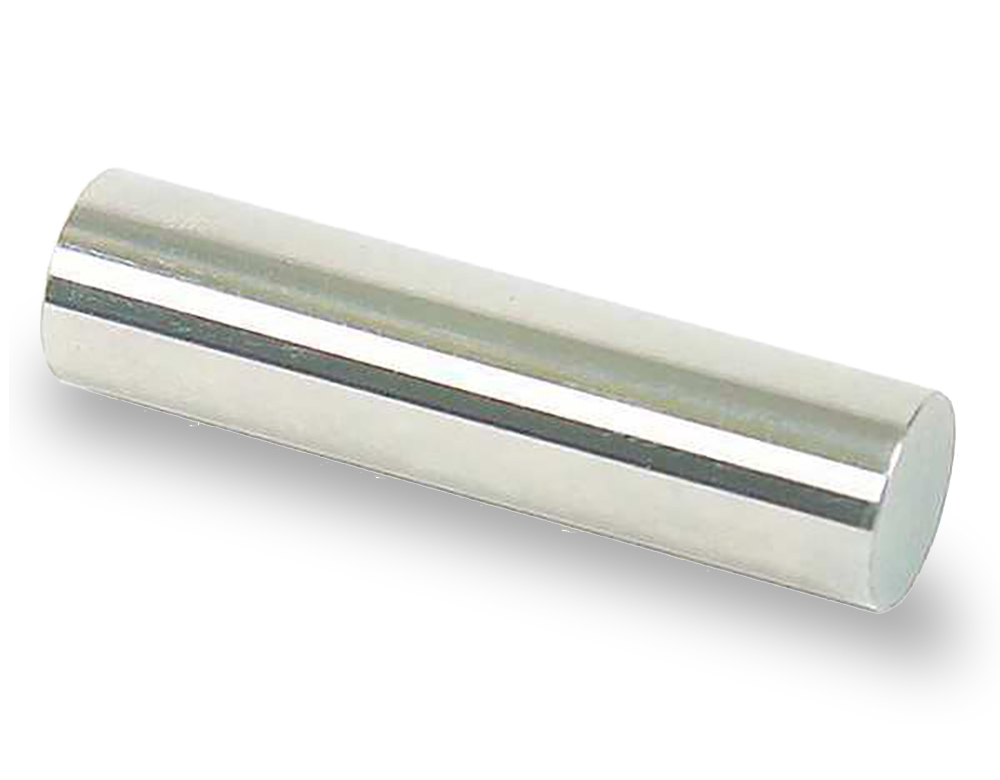
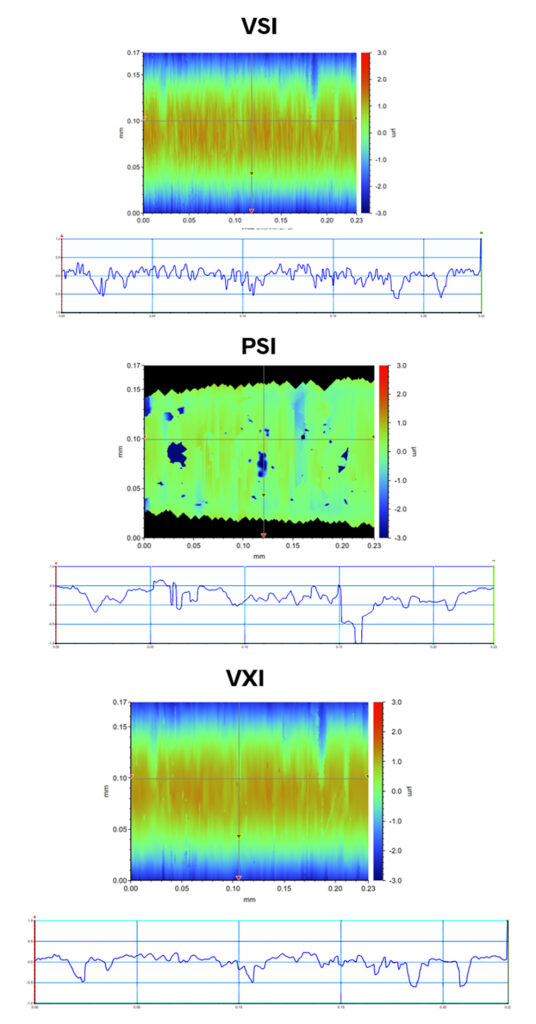
VXI measurement of the surface of a cylindrical, polished gauge pin
USI
Universal Scanning Interferometry (Bruker USI) is actually not a mode, per se; instead, it is a self-adapting algorithm that provides sub-nanometer vertical resolution over 10’s of microns range. USI enables an inspector to measure parts without having significant knowledge of the measurement technologies or even the nature of the surface itself. It represents another step in improved usability—letting inspectors focus on parts and quality rather than addressing the measurement system itself.
As measurement systems continue to evolve, the algorithms behind the scenes will continue to improve as well. While more of the details may move “under the hood,” it will continue to be important for inspectors to understand their results, and the details of acquisition and analysis that generate those results.
Want to know more? Attend the new, one-day Surface Metrology/Tribology class! Or, check out our on-line classes through udemy.com.
Please fill out the form below to download this article as a PDF:
