How would you go about measuring these coins? In terms of value, the most precious would likely depend upon your age, and possibly the time left on your parking meter! In terms of surface texture, the measurement method will also depend on the application…
2D vs 3D instruments
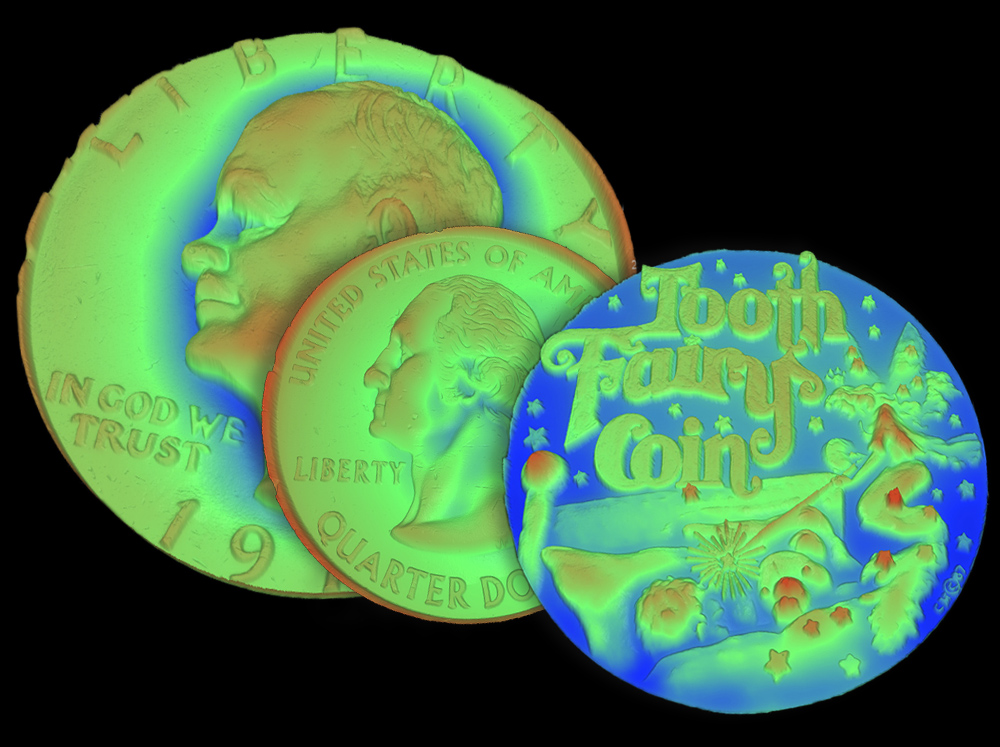
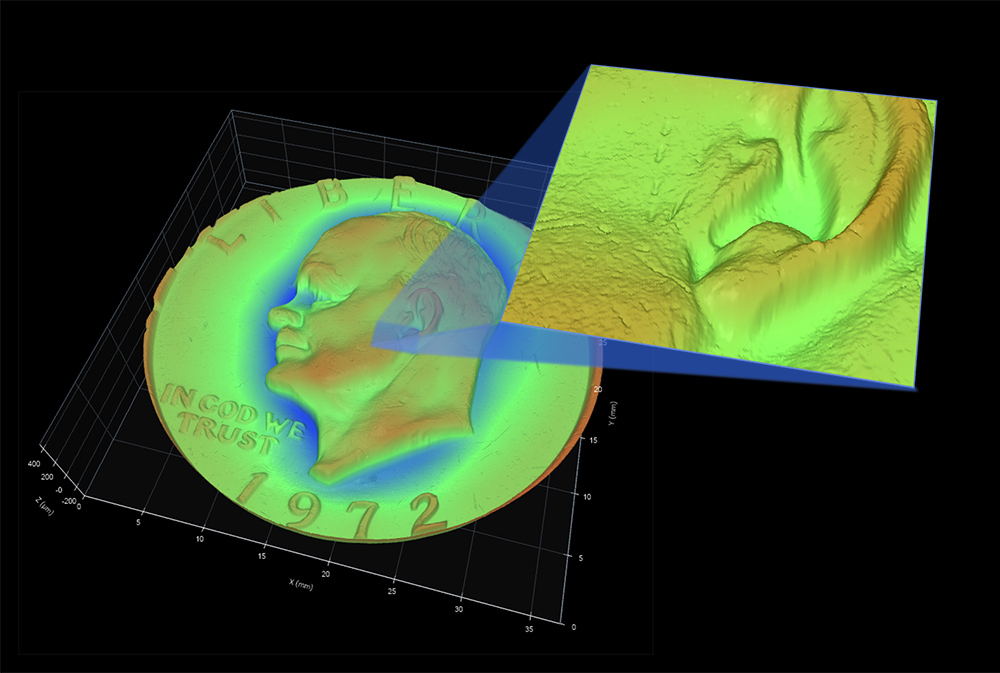
If you are coming from the world of 2D stylus measurement to areal (3D) optical measurement, you may be encountering stitching for the first time. Stitching is a technique to assemble multiple, high resolution images into a single, large, high-resolution dataset. In the example below, the surface of the coin has been stitched from dozens of high resolution images.
With a stylus-based system, scan lengths can be up to tens of millimeters long. Long traces are useful, and necessary, for analyzing texture features with long spatial wavelengths (waviness and form). But stylus data is typically only a single trace wide, so you only see a limited slice of the surface.
A 3D (areal) measurement quantifies an area of the surface rather than just a trace, providing greater information, including directionality of the texture, porosity, etc. An areal dataset typically consists of many millions of data points; yet, the actual measurement area may only be a few millimeters across; large enough to see features such as roughness, pits and scratches, but not enough to measure larger surface undulations.
Measuring large surfaces with 3D instruments and the tradeoffs
In order to measure a larger area, there are two options with optical systems:
- use a lower magnification objective
- stitch together a number of smaller, higher resolution measurements.
The first option is quick and easy, particularly if your instrument includes a turret to switch between objectives on-the-fly. When you switch to a lower magnification, however, the available sensor pixels are spread out over a larger area of the surface, resulting in lower spatial (lateral) resolution.
Stitching retains the resolution obtained at higher magnification, resulting in a tremendous amount of data. By filtering the data, we can analyze all spatial wavelengths of the texture, from short wavelength roughness through long wavelength form—all from one dataset.
There are two significant tradeoffs for stitching. The first is the time required to obtain the full measurement, which may run into hours for larger surfaces. The second is the large size of the data files, which can be a burden, both in terms of storage space and analysis time.
So when should I stitch?
The application really dictates whether stitching is worth the extra time and the larger file size. Take the image of the coins again:
Just as the value of the coin depends on the application, the choice to stitch also depends on which information we need to know about the surface. If the application is only affected by the overall shape of the surface, a single, low-magnification, low-resolution image may be sufficient. If we need to know the maximum depth of the deepest pores, we could use one low magnification measurement to locate the deepest pores, then switch to high magnification to measure them accurately (again, a quick process). When, however, we need high resolution across the entire surface, stitching is the answer.
To learn more about 3D measurement instruments and analysis, check out the online Surface Roughness, Texture and Tribology short course, available in its entirety or as individual class modules on udemy.com.