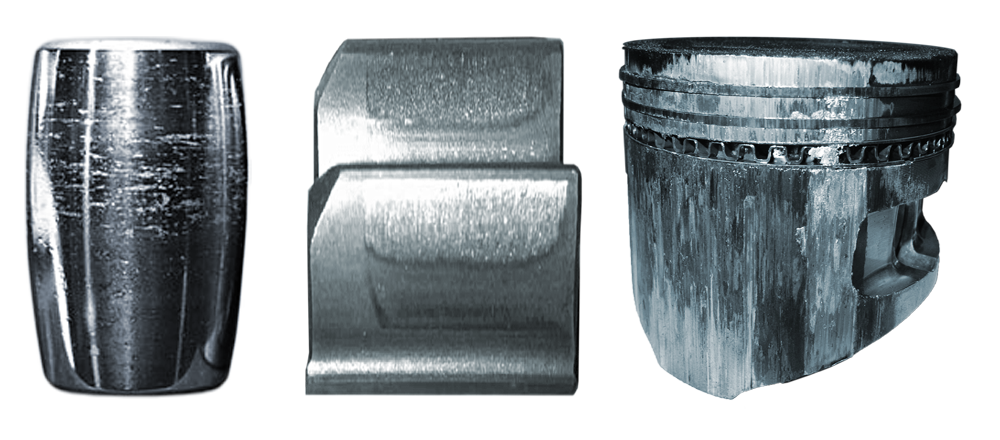
So many wear mechanisms…so many definitions
“Wear” is the progressive modification to a surface. It may result in a loss, deposit, or redistribution of material[1]. Quantifying different types of wear can be challenging. we can name literally dozens of wear mechanisms and terms to describe them, many of which overlap or even contradict.
Three terms that tend to cause confusion are scoring, scuffing, and galling. In his book Wear Analysis for Engineers, Raymond Bayer defines scoring as a chemical change to a surface. It typically leads to a change in appearance, though it may not necessarily lead to a change in roughness. “Good” and “bad” parts may appear very different, yet their average roughness may be the same.

This definition of scoring is actually much different than one often heard in the engine industry. “Scoring” on cylinder bores and pistons typically is used to describe well-defined, deeper scratching or grooving. In this usage, the roughness changes considerably due to a fairly aggressive wear mechanism.
Confusingly, scuffing is also used to describe deep grooves, perhaps over a wider area. Sometimes scoring is used to note deep scuffing—and sometimes vice versa.
Most agree, though, that scuffing or scoring lead to the much more serious wear mechanism, galling. In galling, severe wear, a lack of lubrication, and elevated temperatures can lead to localized welding at isolated regions. Material is ripped from one surface and adhered to the other, quickly degrading a precision interface and potentially leading to seizure of mating components.
While we may agree that galling is a major problem, measuring galling creates its own challenges and confusion. Do we quantify galling based on the change in roughness, or on the amount of material removed from one surface, or the amount of material added to the other surface? Varying approaches lead to different conclusions.
In order to understand the wear in a particular application, we need to start by agreeing on the terms that we will use and how we will define them. Once we reach that agreement, we can start examining the fundamental questions of wear: did the surface change, can we measure the amount, and, most important, can we predict the life of a component based on those measurements?
It’s also important to note that a surface does not necessarily become “smoother” as it wears. We tend to think of a surface becoming smoother (i.e., having a lower roughness amplitude, Sa) during the initial “run-in” period. Sometimes, however, the exact opposite is true, and a surface may become rougher as it is run in. In a typical trajectory, Sa may first decrease as the interface starts to run-in, then stabilize to a steady value for the majority of the functional life. At some point, that value may change considerably again (either rougher or smoother), either due to progressive wear or severe damage. This final change could then signal an impending failure.
We dive deeper into wear, and the techniques and parameters for quantifying wear, in the Wear Mechanisms, Measurement and Specification module of our Surface Texture and Tribology short course. The entire course is available on online, as well as in person.
[1] From: (Table 4.2.1) of Wear Analysis for Engineers, Raymond G. Bayer, HNB Publishing 2002.
