How do I measure Ra 32? or 32 Ra? or 32?
Average roughness (Ra) is the tip of the deep and complex world of surface texture analysis. As you’ll see throughout this blog and many excellent books, we have many tools today that we use to measure surface texture, and hundreds of ways to analyze the data. This information can be incredibly useful for solving production and quality problems.
Despite the complexity, though, by far the most typical encounter you will have with surface texture will be a callout on a print such as this one:
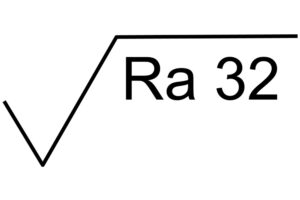
The “angle” is the symbol for surface roughness, and this symbol indicates that the surface should be no rougher than “32.” Prior to the release of the 2018 standards the symbol was written a little differently:
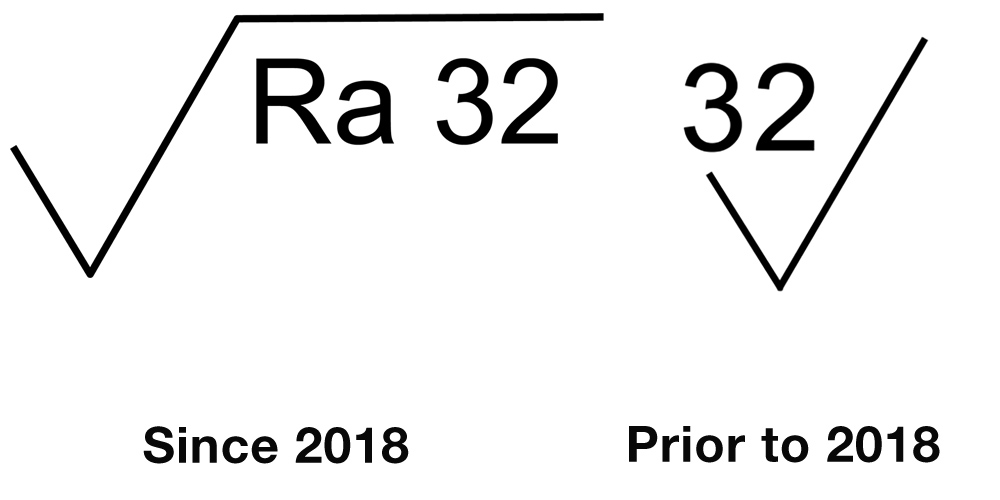
So, what does that mean, how should you measure it, what will this information tell us about the surface, and maybe most compelling: what won’t it tell us?
What is Ra?
Average Roughness, or Ra, is the most commonly specified surface texture parameter. It provides a general measure of the height of the texture across a surface. More exactly, Ra is the average of how far each point on the surface deviates in height from the mean height. Consider this profile, which is a cross-section through a typical surface:

Ra (average roughness) measures the deviation of a surface from a mean height. The horizontal line through the profile represents the arithmetic mean height. The blue areas represent the deviations from that line. Ra, then, is the total blue area divided by the length of the profile.
There is, of course, a bit more to it, but this is the basic gist.
How is Ra Measured?
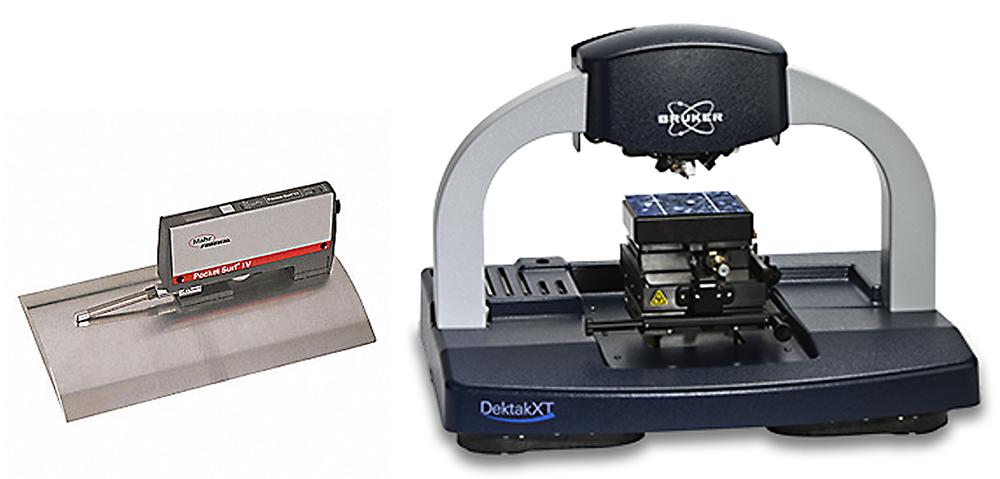
Stylus based measurement instruments are the most common tools for measuring surface texture. In these instruments a small tip is dragged across a surface while its deflection is recorded, providing a profile like the one we see in the image above.
A stylus instrument measures in two dimensions, recording the height at every point along a line. Other instruments, such as optical profilers, can measure in three dimensions, acquiring an entire area of data in just a few seconds. For 3D measurements we use “Sa” as the areal/3D equivalent to Ra (two-dimensional) average roughness.
What are the units of Ra?
Average roughness is typically measured in either microns (µm) or micro-inches (µ-in, µ”). One micron equals roughly 40 micro-inches (µ”). Also note that “micron” and “micrometer” are equivalent, and both terms are commonly used.
Key fact: Ra has units. You will hear people refer to a surface as a “32” or “64” as if it is a unitless standard. This practice dates from the use of “tactile gages” which were widely used to compare surface texture. A machine operator would drag a fingernail across the sample surface and then compare the “feel” to the samples on the tactile gage. Inexact, but quick and easy. The gages often listed the values without units, and thus several generation of machinists learned to feel a “32” surface, and to understand “roughness” as a number rather than a texture.
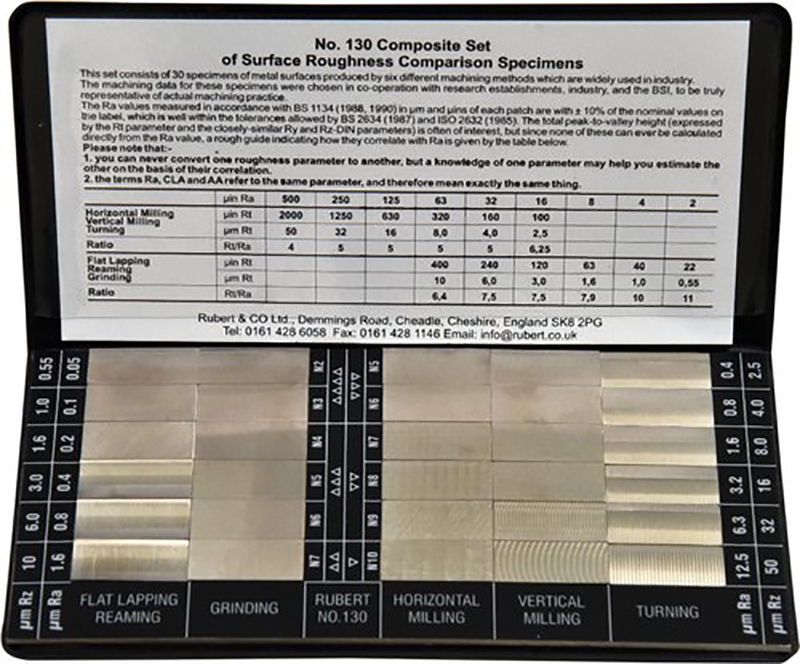
Comparator strips, or tactile gages, provide a qualitative method for determining a surface finish.
But the “32” is not arbitrary: it was determined from real average roughness measurements, with real units. So, what are the units of a “Ra 32” surface? An Ra of 32 µ-in would be typical of a machined surface, such as a brake rotor. An Ra of 32 microns, however, would be more like the surface of brick!
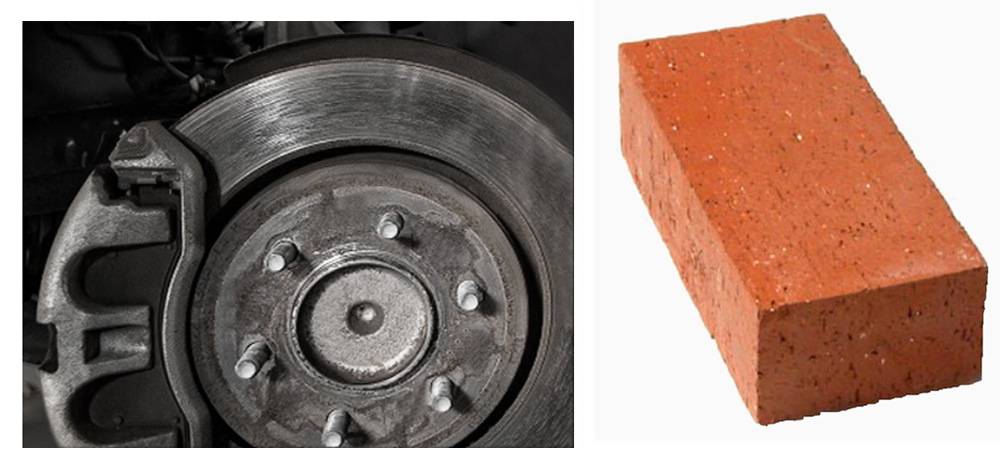
A 32 µ-in Ra finish vs a 32 µm Ra finish. It’s important to know the units!
If it’s not specified, the number in a roughness callout is assumed to be stated in micro-inches. However, if the units aren’t given, the specification is open for misinterpretation.
What does Ra tell me?
Average roughness is a good first-pass indicator of the overall height of the surface texture. For decades it has proven useful for tracking manufacturing processes in industries from automotive to medical devices. It can be measured quickly using only inexpensive gauges, making it an effective tool for shop floor quality control.
What doesn’t Ra tell me?
Ra, however, is blind to several critical aspects of surface texture, and relying solely on Ra to control surfaces can lead to quality issues. This happens all the time, in fact, as you’ll read in examples throughout this blog.
Peaks vs Valleys
Ra measures absolute deviations from the mean height, treating peaks and valleys equivalently. As the image below shows, many very different surfaces—some uniform roughness, some with deep valleys or sharp peaks—may all have the exact same Ra value. Many of the quality and warranty issues that we see stem from this shortcoming of Ra: the parts all meet the Ra spec, yet some squeak, or leak, or wear prematurely. How can that be, when the Ra is within tolerance? The answer is often in those peaks and valleys…
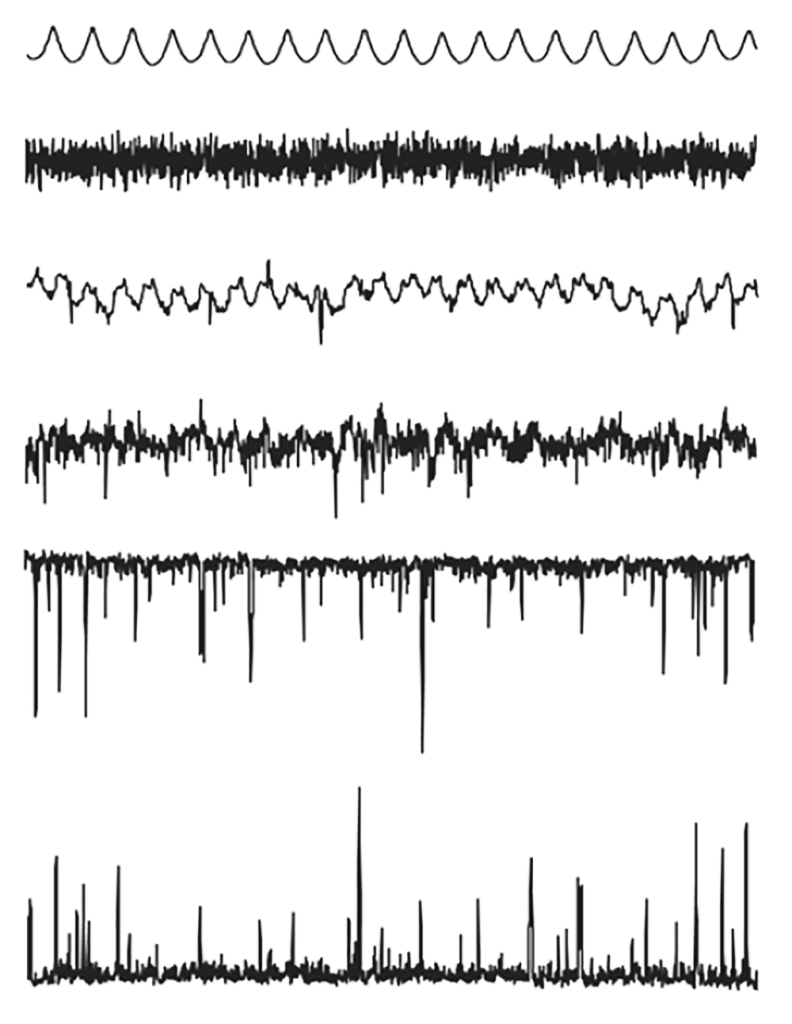
These very different surfaces all have similar Ra values. Which will leak? Which will wear well? Ra cannot distinguish between them. Image courtesy Digital Metrology Solutions.
Spatial Position
Ra cannot distinguish the location of surface features across a profile. A surface with randomly scattered peaks will have the same Ra as a surface with those same peaks clustered at one end of the part. In a mating surface, a concentration of high peaks could lead to uneven loading, scratching, gouging, premature wear, etc. What’s more, a single profile measurement with a stylus instrument is quite likely to not even cross that peak material, leaving it entirely undetected.
Spatial Wavelengths
As we stressed earlier, a surface is a texture, not a number. A very fundamental aspect of surface texture (one which we discuss frequently in this blog and in our classes) is that surface texture consists of “spatial wavelengths,” ranging from short-wavelength roughness to longer wavelength waviness. The longest spatial wavelengths are called “form” and represent the general shape of the part.
The application dictates which spatial wavelengths are important to measure and control. If a part needs to seal, say, we will need to be concerned about its roughness (too rough and its valleys may join up to form leak paths), but we will also need to be concerned about its waviness (too much overall curvature and a gasket may not be able to comply with its shape).
The difficulty with Ra is that it gives no indication of the spatial wavelengths that comprise the texture. In the image below, the engine lifter at the top ran smoothly and quietly. The lifter at the bottom, however, created engine noise because of the waviness in its surface. Both parts met the average roughness spec. If we only measure Ra, we cannot tell the difference!
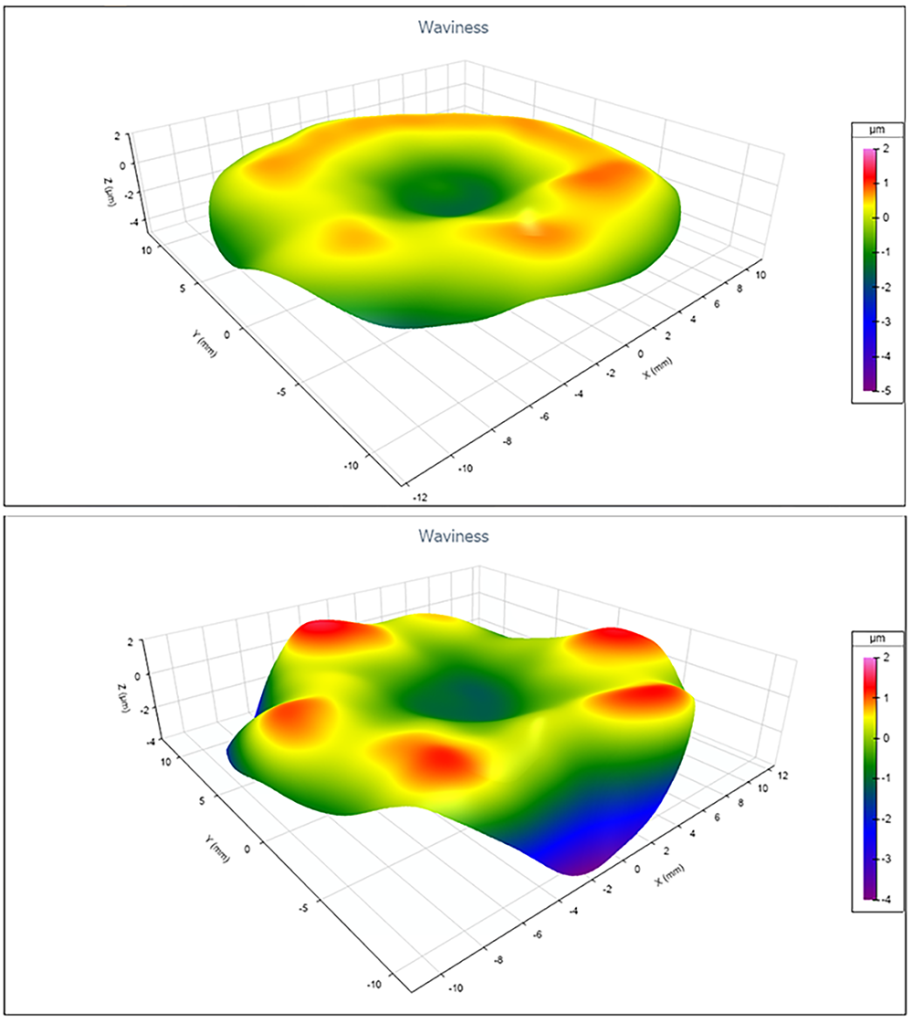
Ra cannot discern short wavelength “roughness” from longer spatial wavelength “waviness.” These areal/3D measurements show two engine lifters with the same Ra. Yet, one ran smoothly while the other was noisy. The longer spatial wavelength texture was the issue…but Ra alone cannot tell you that.
What is Sa?
Sa is the areal (3D) equivalent of two-dimensional Ra. Sa is the “areal average roughness,” the average height of all measured points in the areal measurement. The “S” parameters refer to measurements of a “surface,” as opposed to the “R” parameters which are calculated from the roughness profile.
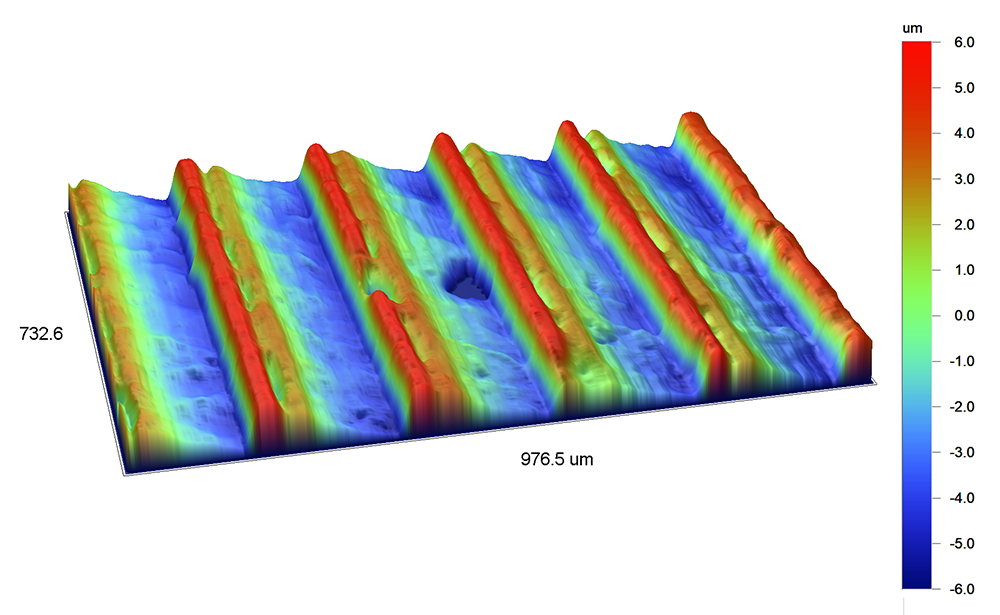
Sa is the areal (3D) average roughness, calculated across the entire area of the dataset.
Read more about Sa in the Surface Texture Parameters Glossary.
There is a great deal more to this topic and to specifying, measuring and analyzing surface texture. We invite you to read the rest of this blog to learn more about it. You may also want to learn more about our in-person classes. The Surface Texture and Tribology Short Course is also available on udemy.com if you are looking to take a deeper dive into surface texture analysis.
Please fill out the form below to download this article as a PDF:
